Get the article’s highlights: Listen to the podcast.↓
Your favorite North Face pack is caked in dirt and smells funky. You’re worried washing will ruin it. I’ll show you the professional method to clean it safely.
The safest way to clean your North Face backpack is by hand-washing1. Use a soft brush, lukewarm water, and a special non-detergent soap. This method protects the straps, zippers, and internal waterproof coatings that a washing machine can easily destroy, preserving your pack’s lifespan and function.

I know how tempting it is to just toss a dirty backpack into the washing machine and hope for the best. In my line of work, I’ve learned that taking shortcuts with high-performance equipment, whether it’s a complex mold or a technical backpack, almost always leads to regret.
The materials and construction of your North Face pack are designed for performance, not for the brute force of a laundry cycle. Taking the time to clean it correctly is an investment in its longevity. Let’s walk through the process that gear experts and I trust to keep our equipment in top shape for years to come.
[claim claim=”Washing a North Face backpack will always void its warranty.” istrue=”false” explanation=”The North Face warranty covers manufacturing defects, not damage from normal wear, accidents, or improper care. Following the correct cleaning procedure will not void the warranty for defects.”]
[claim claim=”Hand-washing is the method officially recommended by The North Face for cleaning their backpacks.” istrue=”true” explanation=”The North Face and most outdoor gear manufacturers recommend hand-washing to protect the pack’s structural integrity, coatings, and materials from the damage a washing machine can cause.”]
Why is Washing Your North Face Backpack Important?
Your pack looks worn out and might even smell a bit. This isn’t just about looks; accumulated dirt and sweat actively break down the fabric. Here’s why cleaning is essential.
Washing your backpack does more than just make it look good. It removes abrasive dirt, corrosive sweat, and oils that degrade the fabric and waterproof coatings over time. Regular cleaning prevents mold, eliminates odors, and ensures zippers and buckles function smoothly, extending your pack’s life.

The Real Damage of a Dirty Pack
I think of a backpack like any piece of high-performance machinery. It needs maintenance to function correctly. Dirt and grime aren’t just cosmetic issues; they cause real, physical damage.
Fabric and Coating Integrity
The dirt, sand, and grit your pack picks up on the trail act like fine-grit sandpaper. Every time the pack flexes and moves, these particles rub against the fibers, causing them to fray and weaken over time. More than that, the salt and acid from your sweat are corrosive. They can slowly break down the nylon fabric and delaminate the waterproof polyurethane (PU) coating on the inside, which is what keeps your gear dry.
Functionality and Hygiene
Beyond the fabric, dirt clogs the teeth of zippers, making them hard to use and eventually causing them to fail. It also blocks the pores in the mesh on your back panel and shoulder straps, which are designed to be breathable. Once clogged, you lose that ventilation, leading to a much sweatier and less comfortable experience. And let’s not forget hygiene. A damp, dirty pack is the perfect breeding ground for mold and bacteria, which leads to that musty smell that’s so hard to get rid of.
| Impact of Neglect | Benefit of Proper Cleaning |
|---|---|
| Fabric abrasion and weakening | Preserves fabric strength and lifespan |
| Breakdown of waterproof coatings | Maintains water resistance |
| Clogged, failing zippers | Ensures smooth zipper operation |
| mold and mildew2 growth | Prevents odors and health issues |
[claim claim=”Dirt acts as a protective layer against UV rays.” istrue=”false” explanation=”Dirt is abrasive and grinds against the fabric fibers, causing microscopic tears and accelerating wear. It does not offer any meaningful protection.”]
[claim claim=”Sweat contains salts and acids that can chemically damage nylon fabric and coatings over time.” istrue=”true” explanation=”The chemical composition of sweat is corrosive and can slowly break down the polymers in synthetic fabrics and the adhesives used for waterproof linings.”]
Can You Just Throw Your North Face Backpack in the Washing Machine?
You want the quickest, easiest way to get your pack clean. But the aggressive tumbling of a washer can rip straps and destroy waterproof coatings. Let’s look at the risks.
It’s a huge risk. The violent action of a washing machine, especially a top-loader, can tangle and tear straps, rip mesh pockets, and strip the pack’s internal waterproof lining. Always check the care label first. If it doesn’t explicitly say "machine washable," hand-washing is the only safe option.

I’ve seen the aftermath firsthand. A client of mine, an avid hiker, thought he could save time by machine-washing his expensive pack. The result was a disaster. The main shoulder strap was nearly torn off at the seam, and the delicate inner coating that kept his gear dry was peeling away in sheets. He saved an hour but ruined a $200 backpack. This is why understanding the "why" behind the process is so critical, just as it is in manufacturing.
The Dangers of the Drum
A washing machine is designed for clothes, not structured items with straps and buckles.
- Tumbling Action: The aggressive tumbling tangles straps and webbing, putting immense stress on the stitching. This is how straps get torn.
- Agitators: Top-loading machines with a central agitator are the worst offenders. They can easily catch and rip mesh pockets or even bend the backpack’s internal frame.
- Delamination: The combination of force and harsh detergents can cause the protective inner PU coating to peel away from the fabric, rendering the pack’s water resistance useless.
- Hardware Damage: Zippers and buckles can be bent, broken, or chipped by hitting the side of the machine’s drum repeatedly.
| Washing Method | Risk Level | Potential Damage |
|---|---|---|
| Top-Loader with Agitator | Very High | Torn straps, ripped mesh, delamination, broken hardware |
| Front-Loader (Gentle Cycle) | Medium | Delamination, stress on seams, potential zipper damage |
| Hand-Washing | Very Low | None, when done correctly |
[claim claim=”All North Face backpacks are machine washable on a gentle cycle.” istrue=”false” explanation=”Many North Face backpacks have specific structures, frames, and coatings that are not suitable for machine washing. Always defer to the care label inside the pack.”]
[claim claim=”The internal polyurethane (PU) coating of a backpack can be stripped away by the abrasive action of a washing machine.” istrue=”true” explanation=”The combination of mechanical tumbling, heat, and harsh detergents can cause the thin waterproof layer to delaminate and peel off the interior fabric.”]
What’s the Professional-Approved Toolkit for a Pristine Clean?
You know you need to clean your pack, but what products are safe? Using the wrong soap can be as bad as using a washing machine. Here’s the expert-approved kit.
You need a soft-bristled brush, a non-abrasive sponge, and a mild, non-detergent soap3 specifically made for technical gear. Avoid household detergents, bleach, and fabric softeners at all costs, as they will strip waterproofing and damage the fabric fibers.

Gathering the right supplies before you start is half the battle. In my business, using the wrong material or tool can ruin a project worth thousands of dollars. The principle is the same here—the right tools ensure a quality result without causing damage. Using something as simple as dish soap might seem harmless, but it can leave behind residues that attract dirt and compromise the pack’s technical features.
The Essential Cleaning Kit
Here is the simple, gear-expert-approved toolkit you’ll need:
- A Soft-Bristled Brush: An old toothbrush is perfect. It’s used for getting grime out of zippers, seams, and heavily soiled spots without abrading the fabric.
- A Non-Abrasive Sponge or Cloth: This is for cleaning the large, flat surfaces of the backpack’s body.
- Mild, Non-Detergent Soap: This is the most important item. Look for products like Nikwax Tech Wash® or Grangers Gear Cleaner. In a pinch, a very small amount of gentle baby shampoo can work. These cleaners rinse away completely without leaving residue or stripping coatings.
- A Large Basin or Bathtub: You’ll need enough space to fully submerge the backpack.
| Cleaning Product | Is it Safe? | Why or Why Not? |
|---|---|---|
| Nikwax Tech Wash® | Yes | pH-neutral, non-detergent, rinses clean, preserves DWR. |
| Household Laundry Detergent | No | Contains surfactants that strip DWR and leave residue. |
| Bleach | No | Weakens and discolors nylon fibers, causing irreparable damage. |
| Fabric Softener | No | Clogs the pores of breathable fabrics and can damage coatings. |
[claim claim=”Dish soap is a safe alternative to specialized gear cleaner.” istrue=”false” explanation=”Dish soaps contain surfactants and degreasers that can strip the factory-applied DWR coating and may leave behind a residue that attracts dirt.”]
[claim claim=”A soft-bristled toothbrush is an ideal tool for cleaning dirt out of zipper teeth and seams.” istrue=”true” explanation=”The soft bristles are effective at dislodging grime from tight spaces without being abrasive enough to damage the fabric or zipper coils.”]
How Do You Deep Clean Your North Face Backpack in 5 Steps?
You have your tools and you’re ready to wash. A clear, step-by-step process is crucial to avoid mistakes. Follow this industry-standard guide for a perfect, safe clean.
First, empty and prep the pack. Second, spot-treat any tough stains. Third, submerge and soak it in lukewarm water with gear soap. Fourth, gently scrub all surfaces. Finally, rinse it thoroughly until all soap is gone, squeezing gently.
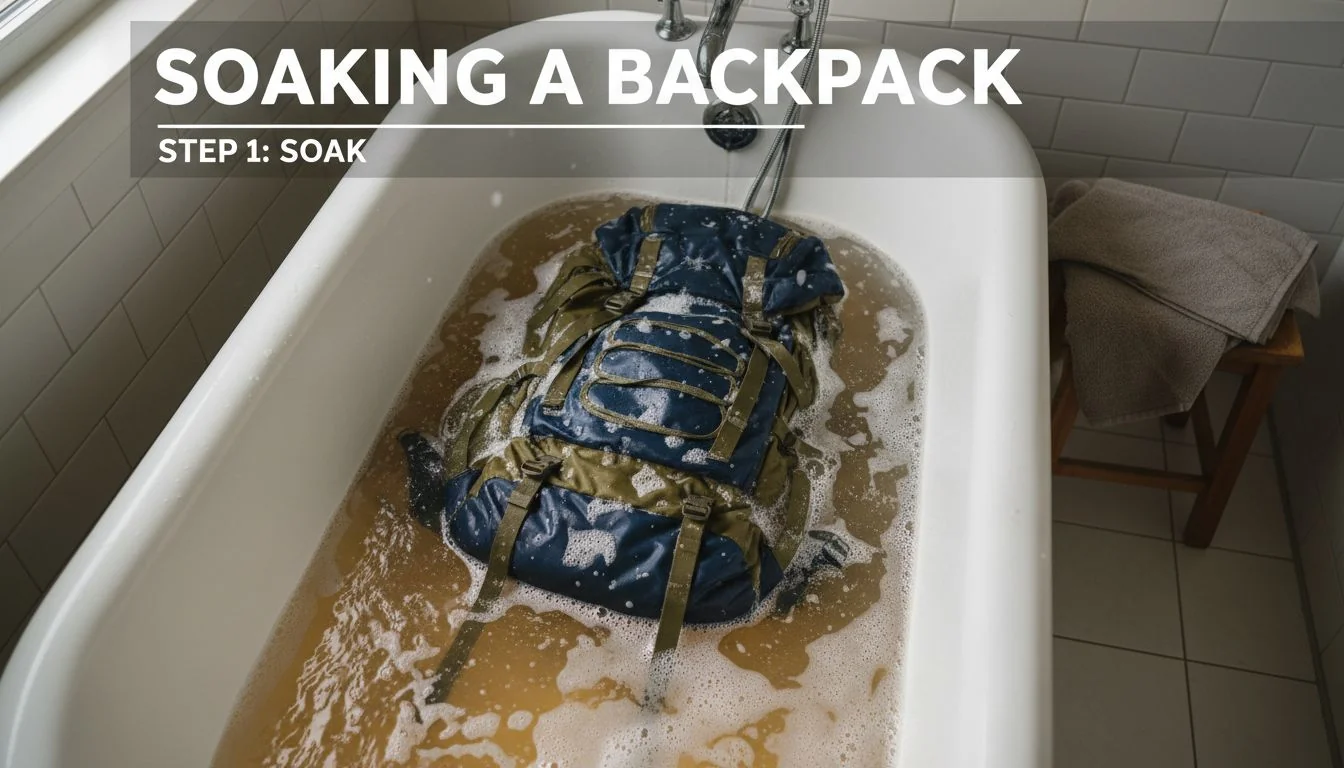
This hand-washing process is the gold standard recommended by The North Face and other gear professionals. It’s methodical and gentle, ensuring every part of your pack gets clean without stressing the materials. I once rushed this process and found a half-eaten granola bar from months ago during the scrubbing step—trust me, emptying it completely first saves you a much bigger mess.
Step 1: Empty and Prep
-
Unzip All Pockets: Make sure every pocket and compartment on the backpack is unzipped and open.
-
Remove Debris: Turn the backpack upside down and shake it vigorously to clear out any dust, sand, or crumbs.
-
Deep Clean Interior: For stubborn grime inside, use a vacuum with a brush attachment to clean out dirt from the corners.
Step 2: Spot Treat Stains
-
Apply Cleaner: Directly apply a small amount of non-detergent, specialized cleaner onto tough stains like grease or mud.
-
Scrub Gently: Use a soft-bristled brush (like an old toothbrush) to lightly scrub the stain in a circular motion.
-
Let it Sit: Allow the cleaner to work on the stain for 10-15 minutes, but do not let it dry completely before washing.
Step 3: Submerge and Soak
-
Prepare Lukewarm Water: Fill a bathtub or large basin with about 4-6 inches of lukewarm water. Never use hot water, as it can damage the pack’s waterproof coating or cause colors to fade.
-
Mix in Soap: Add the recommended amount of your gear-specific soap and stir to mix it into the water.
-
Submerge Fully: Place the entire backpack into the water, pressing down on it to ensure the soapy water saturates all the fabric.
-
Be Patient: Let the backpack soak for 30-60 minutes to help break down and loosen grime.
Step 4: Gentle Scrub
-
Wipe Surfaces: Use a sponge or soft cloth to wipe down the interior and exterior surfaces of the pack.
-
Focus on Key Areas: Pay close attention to the parts that contact your body, like the shoulder straps, hip belt, and back panel, as these areas collect the most sweat and oil.
-
Clean the Details: Use a small brush to carefully clean the zipper teeth and along the fabric seams.
Step 5: Rinse Thoroughly
-
Change the Water: Drain the dirty, soapy water and refill the basin with clean, cool water.
-
Rinse Repeatedly:Submerge the backpack again, pressing and swishing it around to rinse out the soap. Repeat this until the water runs clear and is free of suds.
-
Squeeze Gently: Lightly squeeze the water out of the foam padding in the shoulder straps and back panel.
-
Important Note: Never wring or twist the backpack! Doing so will damage the internal foam and fabric structure.
[claim claim=”Hot water is best for cleaning a backpack because it kills more germs.” istrue=”false” explanation=”Hot water can damage the backpack’s waterproof coatings, warp foam padding, and cause fabric colors to bleed. Lukewarm water is sufficient and much safer.”]
[claim claim=”You should leave soap residue on the pack to keep it smelling fresh.” istrue=”false” explanation=”Soap residue is sticky and actually attracts more dirt. It can also irritate your skin and degrade the fabric over time. A thorough rinse is critical.”]
How Often Should You Wash Your North Face Backpack?
You don’t want to over-wash your pack, but you don’t want to let it rot either. Finding the right balance is key. Here is a simple guide based on how you use it.
This depends entirely on your usage. For a daily commuter pack, a deep clean once or twice a year is plenty. For a hiking pack, clean it after any trip where it gets very sweaty or muddy to prevent long-term damage.

There isn’t a single magic number for how often to wash your pack. Over-washing can cause unnecessary wear, while under-washing allows corrosive sweat and abrasive dirt to do their damage. The right frequency is a balance, and it depends on what you put your pack through. Think of it as a maintenance schedule tailored to its workload.
For the Daily Commuter or Student
If you use your pack for carrying a laptop, books, and a lunch to work or school, it’s not seeing much abuse. Sweat and dirt buildup is minimal.
- Frequency: A full, deep clean every 6 to 12 months is usually sufficient.
- Triggers: Wash it if you have a major food spill or if it starts to develop an odor. Otherwise, spot-cleaning4 minor stains as they happen is your best approach.
For the Weekend Hiker
If you’re taking your pack on day hikes or weekend trips, it’s getting exposed to more sweat, dirt, and sun.
- Frequency: A deep clean at the end of each hiking season (e.g., late fall) is a great rule of thumb.
- Triggers: Give it a wash after any particularly grueling trip where it became soaked with sweat or caked in mud.
For the Serious Adventurer
If you’re using your pack for multi-day backpacking trips, mountaineering, or travel in humid or salty environments, maintenance is critical.
- Frequency: Clean it after every major expedition.
- Triggers: Exposure to saltwater is a major one—rinse your pack with fresh water as soon as possible, as salt is extremely corrosive to zippers.
| Usage Type | Recommended Frequency | Key Cleaning Triggers |
|---|---|---|
| Daily Commute | 1-2 times per year | Food spills, noticeable odor |
| Weekend Hiking | 1-2 times per season | Heavy sweat, caked-on mud |
| Backpacking/Travel | After each major trip | Saltwater exposure, extreme dirt |
[claim claim=”You should wash your backpack after every single use, no matter how light.” istrue=”false” explanation=”Over-washing accelerates wear and tear on the fabric, seams, and coatings. Spot-cleaning is better for minor dirt, saving deep cleans for when they are truly needed.”]
[claim claim=”Rinsing a backpack with fresh water after exposure to saltwater is crucial to prevent corrosion.” istrue=”true” explanation=”Salt is highly corrosive to metal components like zipper sliders and can also degrade fabric over time if left to sit.”]
How Do You Dry a North Face Backpack After Washing to Prevent Mold and Damage?
Your pack is clean but soaking wet. Drying it the wrong way can lead to mold, heat damage, and a ruined pack. I’ll show you the only safe method.
Absolutely never use a machine dryer. The intense heat will melt plastic parts, warp foam padding, and destroy the waterproof coatings. The only safe way is to air-dry it. Hang it upside down in a well-ventilated area away from direct sun.

This is probably the most critical step in the entire process, and it’s where patience pays off. I learned this the hard way years ago. I got impatient and used a pack that felt "mostly dry." The musty, mildewy smell that developed took weeks and multiple re-washes to finally get rid of. High heat is the enemy of technical gear.
The Golden Rule: No Heat
A machine dryer will destroy your backpack. The high heat can:
- Melt or deform nylon zippers and plastic buckles.
- Warp and compress the foam padding in the shoulder straps and back panel, making it permanently uncomfortable.
- Destroy the internal PU waterproof coating and the external DWR finish.
The Proper Air-Drying Method
This is the simple, safe, and effective way to dry your pack.
- Hang it Upside Down: Use a hanger to hang the backpack upside down. This allows water to drain away from the seams and bottom of the pack most effectively.
- Open Everything: Unzip every single pocket and compartment. This maximizes airflow to every corner of the pack. You can even prop open main compartments with a small, light object to help air circulate inside.
- Find the Right Spot: Hang it in a well-ventilated area. Indoors with a fan pointed at it is great. Outdoors in the shade is also excellent. Avoid direct sunlight, as prolonged UV exposure can fade the colors and degrade the nylon fabric over time.
Be patient. A full dry can take 24 to 48 hours. This patience is what prevents the growth of mold and mildew, which can start forming in as little as 24 hours in damp conditions.
| Drying Method | Dos | Don’ts |
|---|---|---|
| Air-Drying | Hang upside down, open all pockets, use a fan, be patient. | Don’t hang in direct sunlight for long periods. |
| Machine Drying | (none) | Never use a machine dryer, even on a low/no heat setting. |
[claim claim=”Drying a backpack in direct, hot sunlight is the fastest and most effective method.” istrue=”false” explanation=”While it may be fast, direct UV radiation from the sun will fade the fabric’s color and can degrade the nylon fibers and waterproof coatings over time.”]
[claim claim=”Mold and mildew can begin to grow on a damp backpack in as little as 24 hours.” istrue=”true” explanation=”In warm, humid, and poorly ventilated conditions, mold spores can colonize damp fabric within 24-48 hours, leading to staining and persistent musty odors.”]
How Can You Restore Your Backpack’s Weatherproofing After Washing?
Your pack is finally clean and dry, but you notice water soaks in instead of beading up. A pack that isn’t water-resistant is a liability. Here’s how to fix it.
Yes, and it’s easy. Once the backpack is completely dry, apply a spray-on Durable Water Repellent (DWR) treatment like Nikwax TX.Direct® Spray-On. Apply it evenly, wipe off any excess, and let it air dry for 24 hours to cure.
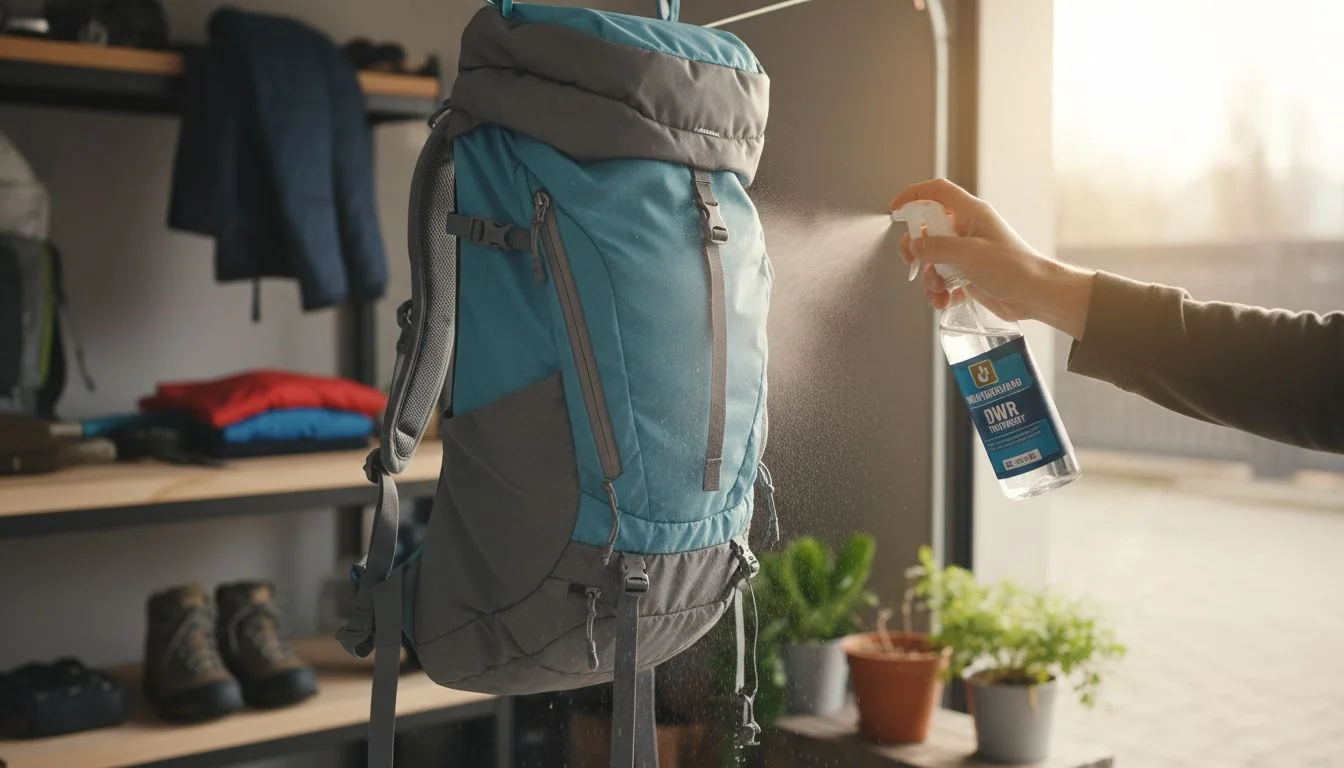
Even the most careful washing will gradually wear down the factory-applied DWR coating. This is the finish that makes water bead up and roll right off the fabric. When you see the outer fabric "wetting out"—meaning it’s absorbing water and getting dark—it’s time to reapply.
This single step is what truly restores your pack’s performance and protects your gear inside. It’s like the final quality check in a manufacturing process that ensures the product performs as designed in the real world.
The DWR Restoration Process
This is best done after a thorough cleaning, as the treatment bonds most effectively to a clean surface.
Step 1: Test and Confirm
After your pack is dry, sprinkle a few drops of water on it. If the water beads up and rolls off, your DWR is still working. If it soaks into the fabric, it’s time to reapply.
Step 2: Apply the Treatment
Hang the clean, dry backpack up. Following the product’s instructions, spray the DWR treatment5 evenly across the entire outer surface from about 6-8 inches away. Pay special attention to the high-exposure areas like the top lid and front panels, as these take the brunt of the rain.
Step 3: Cure for Full Effect
After applying, let the pack sit for a few minutes, then take a damp cloth and wipe off any excess drips to prevent spotting. Then, let the backpack hang to air dry for a full 24 hours. This curing time is essential; it allows the treatment to fully bond to the fabric fibers, creating a durable and effective water-repellent barrier.
| DWR Status | Visual Cue | Action Required |
|---|---|---|
| Working | Water beads up and rolls off the fabric. | None. |
| Failing | Water soaks into the fabric, causing it to darken ("wetting out"). | Clean pack and reapply DWR. |
[claim claim=”You only need to apply a DWR treatment once during the backpack’s entire life.” istrue=”false” explanation=”DWR is a surface coating that wears off over time due to abrasion, dirt, and washing. It needs to be reapplied periodically to maintain performance.”]
[claim claim=”A new DWR application needs 24 hours to cure properly.” istrue=”true” explanation=”The curing process allows the chemical polymers in the spray to bond completely with the fabric fibers, maximizing the treatment’s durability and water-repellency.”]
Conclusion
Properly cleaning your North Face backpack is simple. By hand-washing, air-drying, and restoring the DWR, you protect your investment and keep your gear ready for the next adventure.
References
-
Hand-washing is the safest way to clean your backpack without damaging its materials or waterproof coatings. ↩
-
Understanding how to properly dry your backpack can prevent mold and mildew growth, ensuring it stays fresh. ↩
-
Using a non-detergent soap is crucial to preserve the waterproofing and integrity of your backpack. ↩
-
Spot-cleaning effectively addresses stains without the need for a full wash, preserving the backpack’s integrity. ↩
-
Reapplying DWR treatment is essential for maintaining your backpack’s water resistance after washing. ↩